Red Velvet Cake with Cream Cheese Frosting


Once a year doesn’t hurt
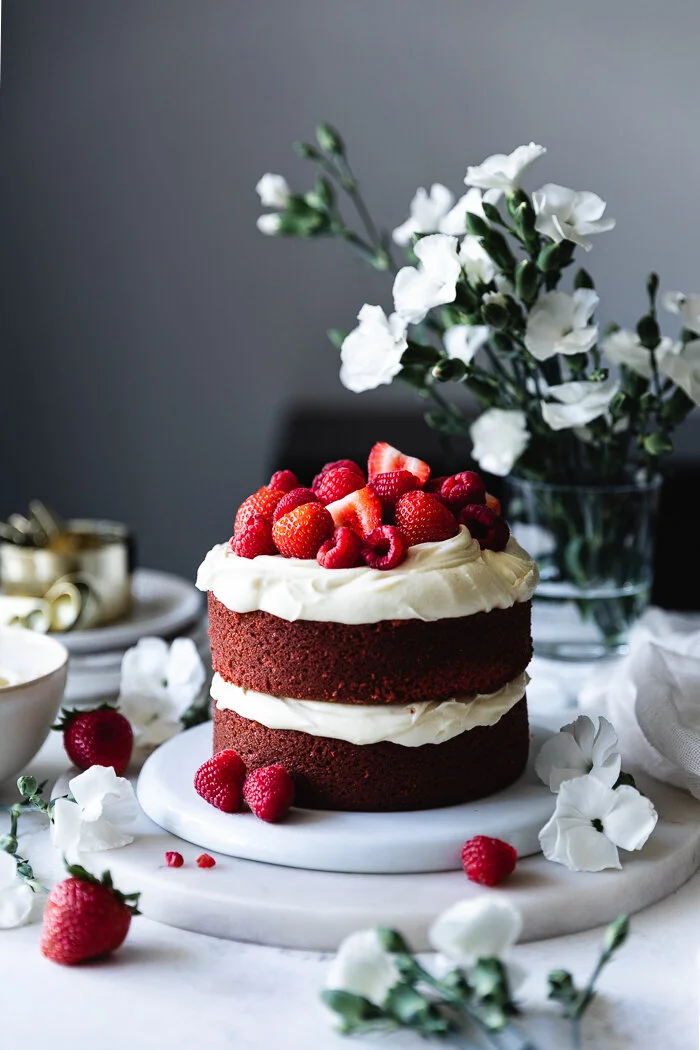
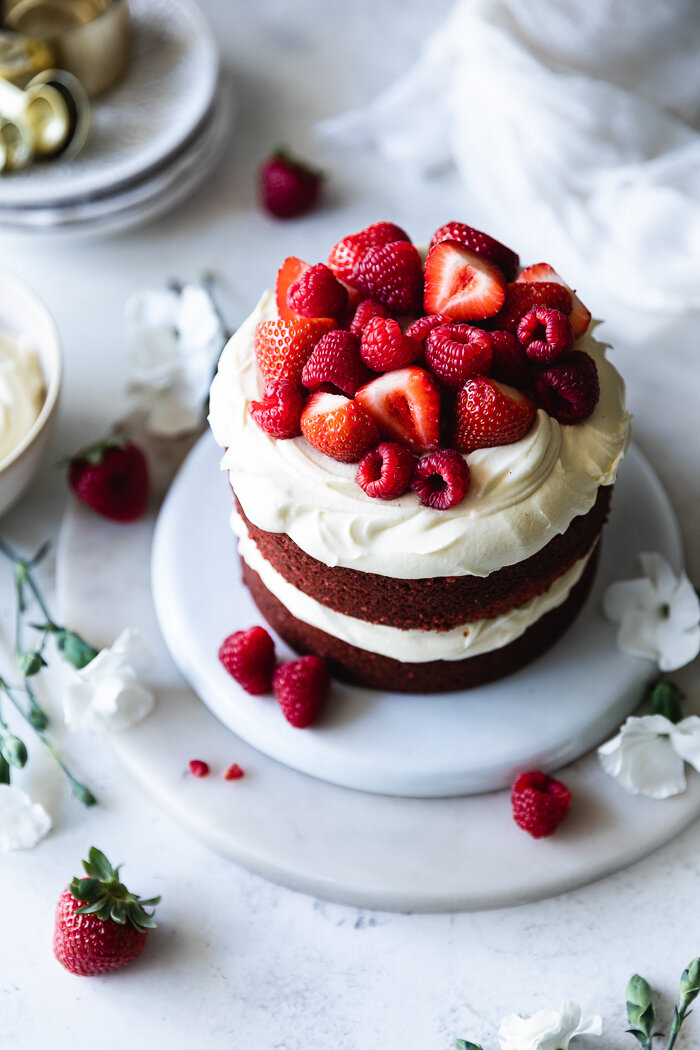
This is the softest red velvet cake with the silkiest cream cheese frosting!! Why? Read one of the reasons at the end of the recipe notes.
My first time eating red velvet was as a little cupcake from a neighborhood shop called, appropriately, Little Cupcake Shop. It was the time when cupcake spots were sprouting out of places you didn’t even know existed. And they became super famous and trendy in a blink. We used to go there every week for a special treat. And for me, one of those treats was a little red velvet cupcake with a super creamy and silky cream cheese frosting.
Curious about what the heck was red velvet anyway, I started researching how it was made. If you are a baking junkie just like me, you probably know by now that red velvet is not actually red but more like light reddish-brown because of the cocoa powder in the mix. WHAAAT?? Story tells that in the 1930’s, in order to create a more smoother and velvety cake, a bit of cocoa powder was added to a batter containing buttermilk and baking soda. The cocoa and buttermilk produce a stronger reaction form the baking soda, creating that airy crumb we all love from red velvet. Because of this, the cake was more of a brick red color. Somewhere in the way someone decided to add red food coloring to make it redder. And from there it went to be a plain vanilla cake with lots of red coloring. So basically that’s the cake that is famous now.
But the little red velvet cupcake that I used to have was nothing like those super bright red cakes. It was more of a deep reddish brick. And the reason was because, even though it had a bit of red food coloring, it still followed the old traditional formula with buttermilk and that bit of cocoa. That way you just need a small amount of red food coloring. And if you use a high quality one, even less.
That’s exactly what I wanted to do with this red velvet cake. Celebrate the particular taste and texture of red velvet by using milk, vinegar, baking soda and that bit of cocoa powder. I also used cake flour to create a very light crumb (see notes on how to make your own cake flour using cornstarch). And yes, a bit of red food coloring to make it fun and festive, because as I said at the beginning, once a year doesn’t hurt!
This is a mini cake perfect to share on Valentine’s Day. Get ready for a super silky and velvety red velvet cake with the creamiest and fluffiest cream cheese frosting. Why is this frosting so soft? Because I first beat it and then I whipped it. It’s such a treat!
Until the next recipe!
Recipe notes
1. How to make cake flour? Measure 1 cup of flour. Remove 2 tablespoons and substitute them with 2 tablespoons of cornstarch. Easy! For this recipe I removed 3 tablespoons of the 1 ½ cup of flour and substituted with 3 tablespoons of cornstarch. Sift once before sifting again with the cocoa powder, baking soda and salt.
2. Cakes made with raw sugar often have a rougher crumb. I pulsed it a few seconds on the food processor to make the granule a bit finer, helping to create a finer crumb.
3. This is the kind of cake that is perfect for making ahead! The flavors and textures will be even more amazing the next day. If you can plan ahead, I strongly recommend you make this cake the day before. Store in the fridge and then let it come down to room temperature before serving.

Red Velvet Cake with Cream Cheese Frosting
Ingredients
Red Velvet Cake
◯ Whole milk – ½ cup + 2 TBSP
◯ White vinegar – 2 TBSP
◯ Cake flour – 1 ½ cup (see notes on how to make your own as I did)
◯ Natural cocoa powder – 2 TBSP + 1 Tsp
◯ Baking soda – ¾ Tsp
◯ Fine sea salt – ¼ Tsp
◯ Butter, at room temperature – 6 TBSP
◯ Raw sugar (see notes) – 1 ¼ cup
◯ Vegetable oil – 1 TBSP
◯ Vanilla extract – ¾ Tsp
◯ Eggs, at room temperature – 2
◯ High quality red food coloring (optional) – 2 Tsp
Silkiest Cream Cheese Frosting
◯ Butter, softened – ½ cup (8 TBSP)
◯ Vanilla extract – 2 Tsp
◯ Confectioner’s sugar – 2 cups, sifted
◯ Cream cheese – 4 TBSP
◯ Coconut milk (or regular milk) – 2 TBSP
◯ Freshly squeezed lemon juice – 1 TBSP
◯ Pinch of fine sea salt
Details
Yield: two 6” cake pans
Total time: 2 hours
Active time:
about 40 minutes
Equipment:
stand or handheld electric mixer, 6” cake pans, bowls and spatulas
Steps
To make the red velvet cake:
Preheat oven to 350°. Grease two 6” cake pans.
Mix milk and vinegar and let it rest for at least 30 minutes. In the meantime prepare the rest of the ingredients.
In a medium bowl sift together the cake flour, cocoa powder, baking soda and salt.
Place room temperature butter in the bowl of a stand mixer with the paddle attachment or in a large bowl to be used with a hand held electric mixer with the beaters on. Beat in medium speed (#3 in the Kitchen Aid) for 2 minutes, until light and pale. Decrease speed to medium-low (#2 in the Kitchen Aid) and add sugar. Increase speed for about 30 seconds and then return to medium-low. Add oil and vanilla and mix until incorporated. Add eggs, one at a time and waiting until one is incorporated to add the next one. Stop mixing and scrape down the sides of the bowl. Mix once more.
Decrease mixer to low and add about ⅓ of the flour mixture, followed by half of the milk mixture. Repeat with same amount of flour and follow with remaining milk. Add remaining flour. Add food coloring and mix just until incorporated and no large streaks of flour are visible. Stop mixer and scrap down the sides of the bowl if necessary. Transfer batter to greased cake pans, splitting it equally between the two of them. Bake for 30 minutes, until a toothpick comes out clean after inserted through the center of the cakes. Take them out and wait about ten minutes before removing cakes form pan. Let them cool completely before frosting.
To make the cream cheese frosting:
Place softened butter in your mixing bowl. Beat it in medium speed until pale and light, about two minutes. Decrease speed to low and add the vanilla extract. Beat for 30 seconds. Start adding sifted confectioner’s sugar through the feeding lid, about ¼ cup at a time. Mix until incorporated.
Stop mixer and switch your paddle or beaters for the whisk attachment. Start running mixer in low adding the cream cheese by pieces. Add coconut milk, lemon juice and salt. Increase speed to medium-low and whip for 2 minutes. Scrap down the sides of the bowl and, if necessary, adjust taste and consistency by adding a bit more of milk or lemon juice for a creamier frosting or a bit more of sugar for a stiffer one. Mine was pretty soft and spreadable.
Frost your cake. If possible, let it chill in the fridge for a few hours and then come down to room temperature before serving. This will improve significantly the flavor and texture of both the frosting and cake.
Serve with red fresh fruits if desired.
